
My previous assumption for failure-to-fire was, that the bolt didn’t close properly (possibly due to the overly tight extractor) and thus some of the power from the hammer was used to close the bolt and then there was not enough force to ignite the primer. Now it seems that the power from the hammer is lost somewhere else..
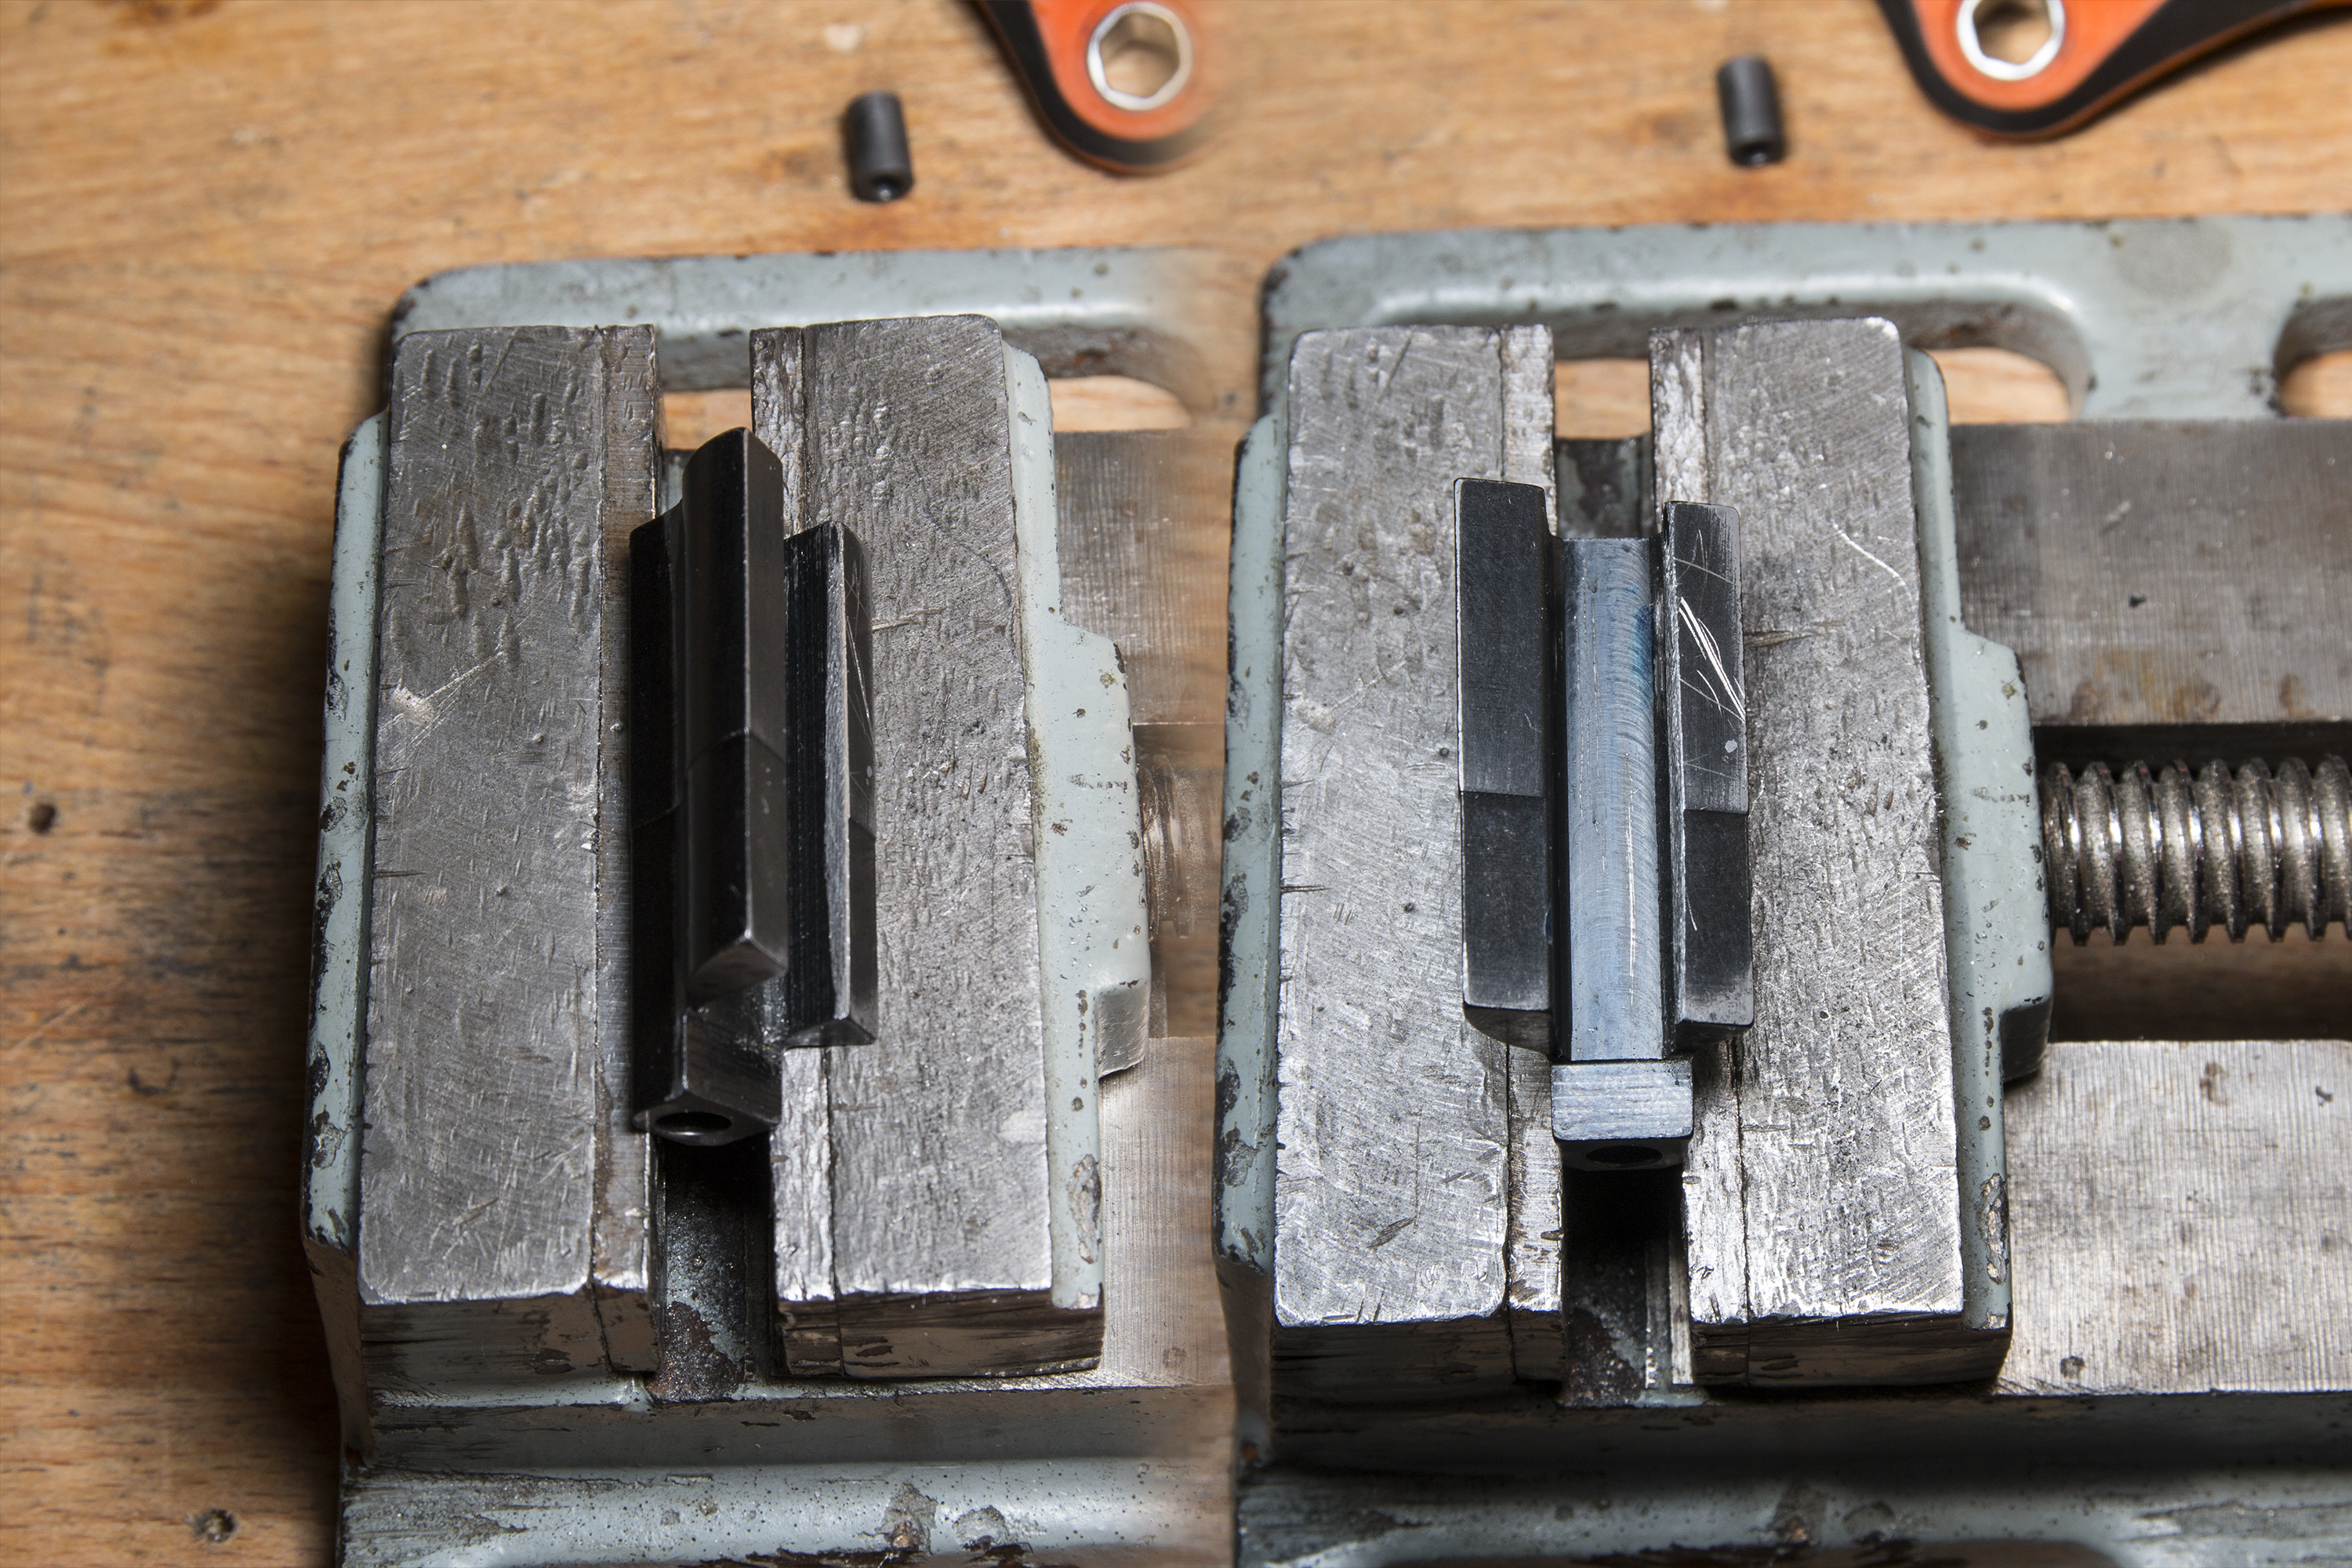
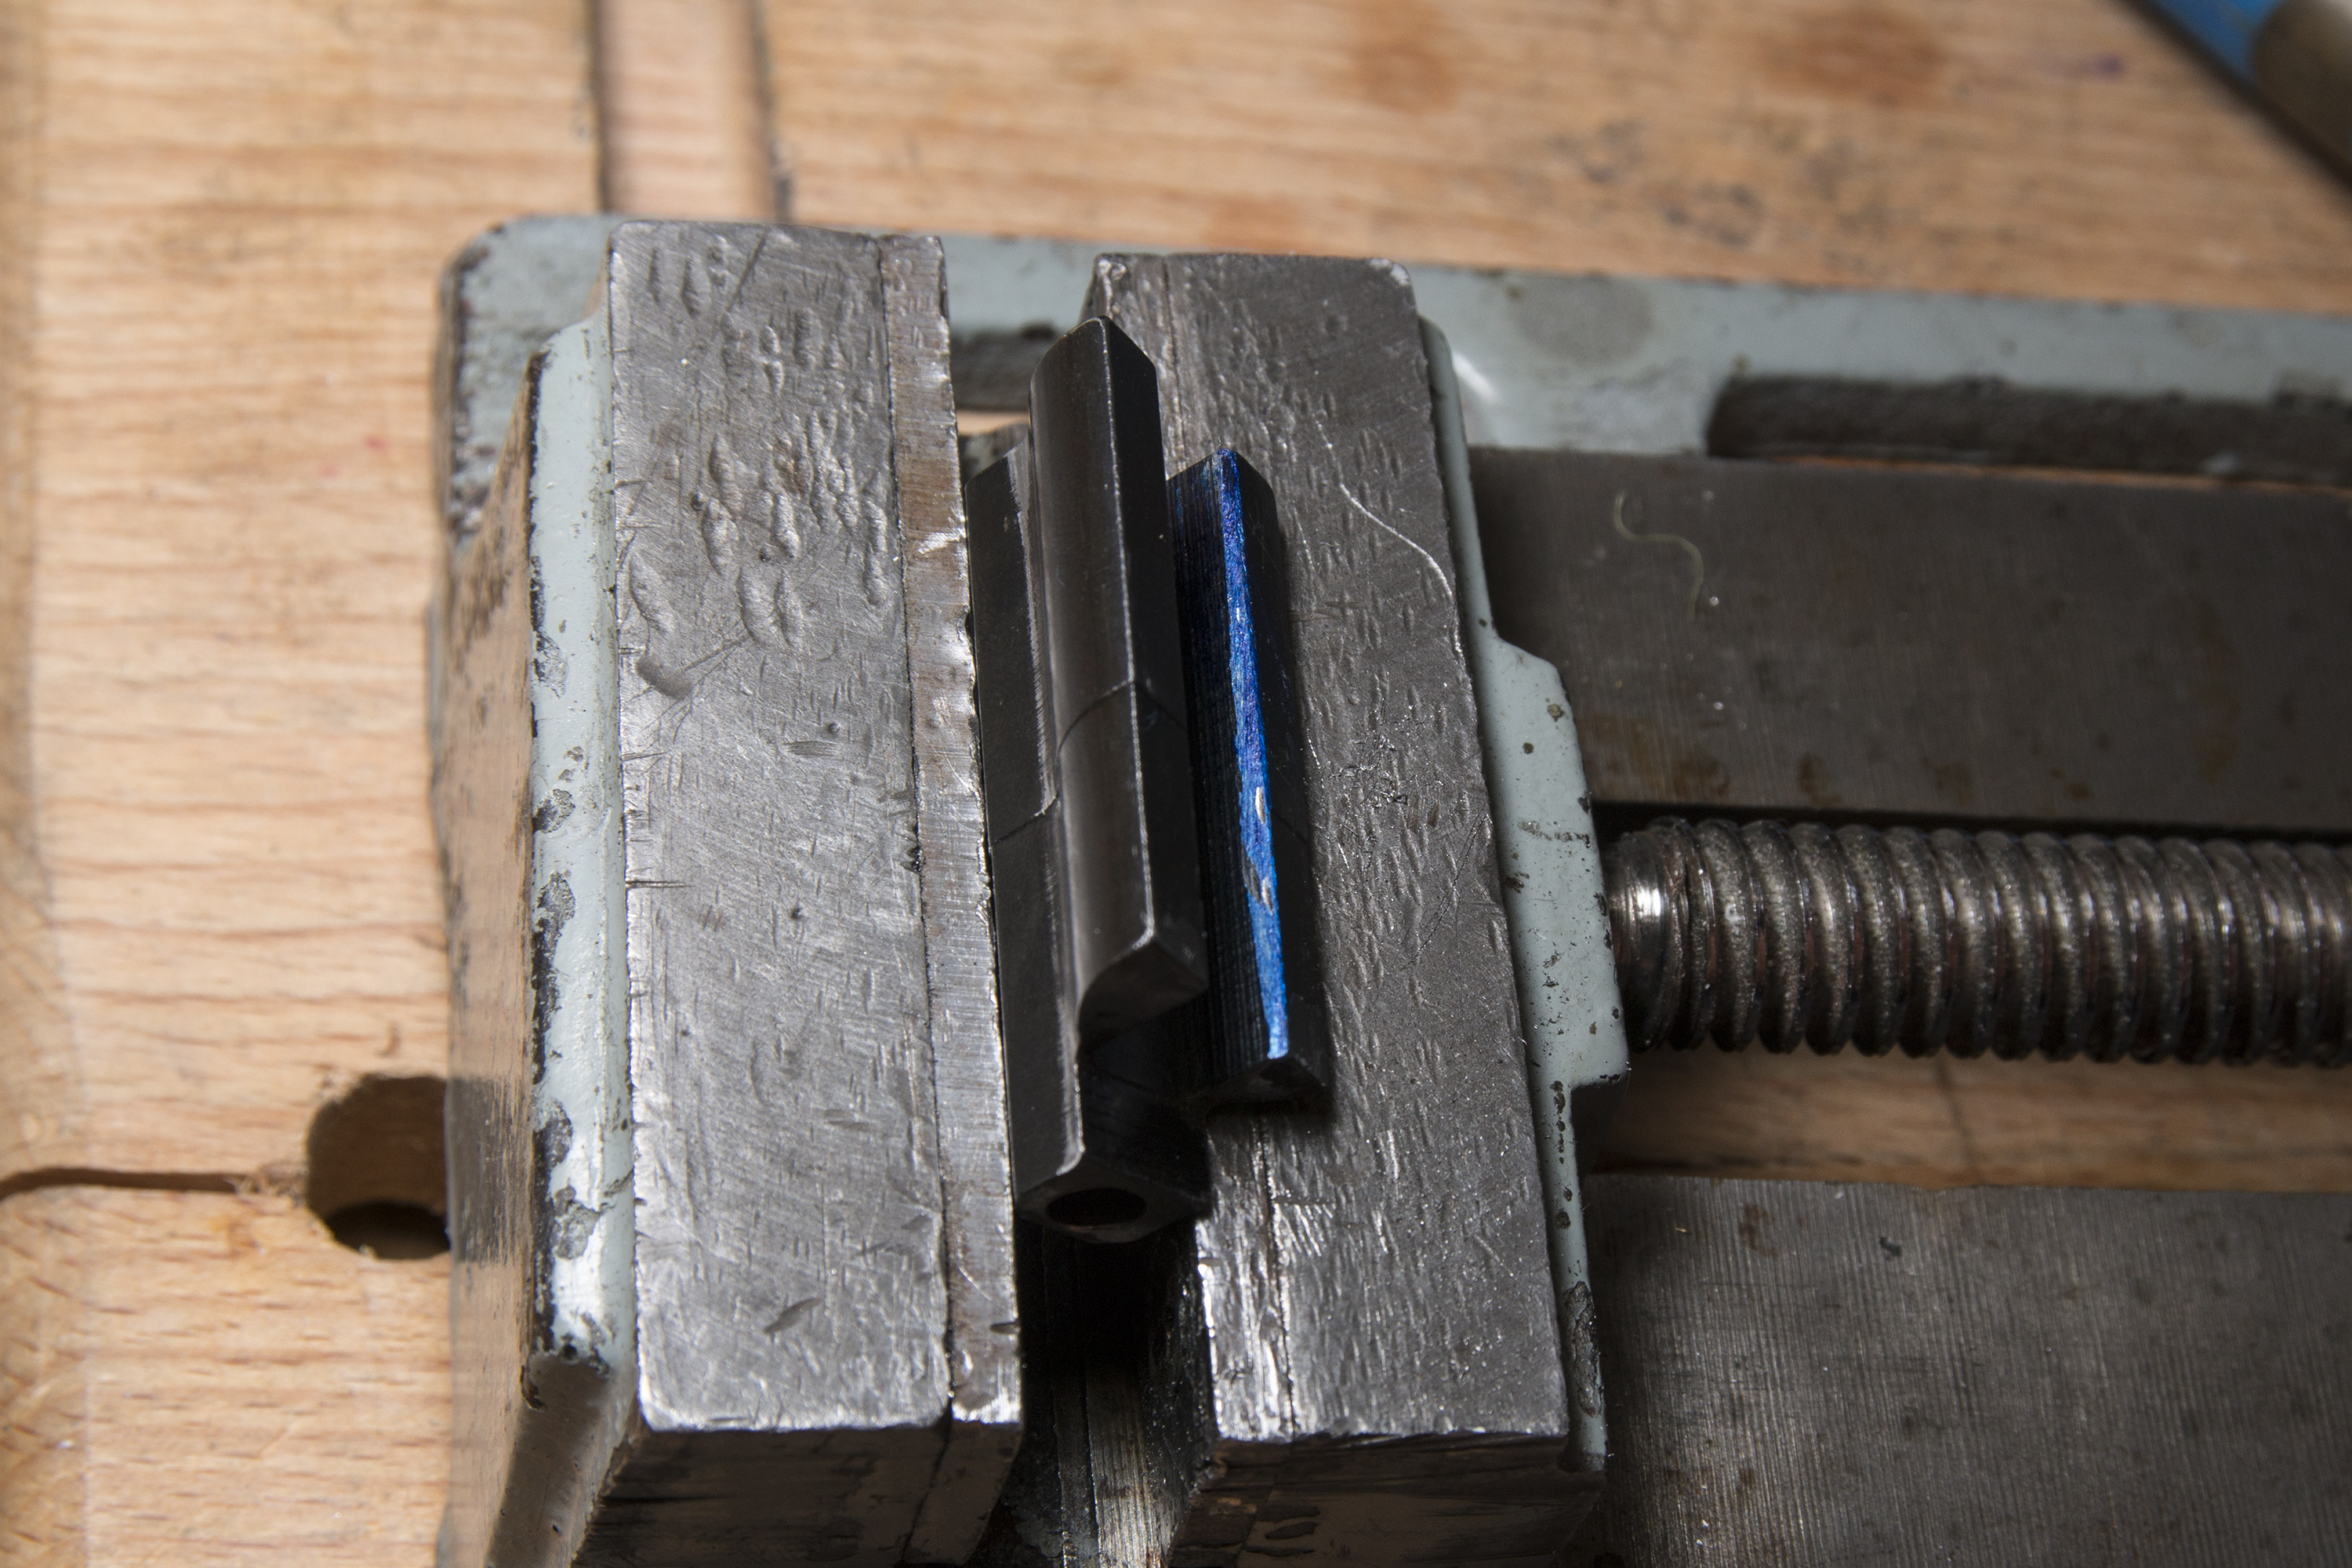
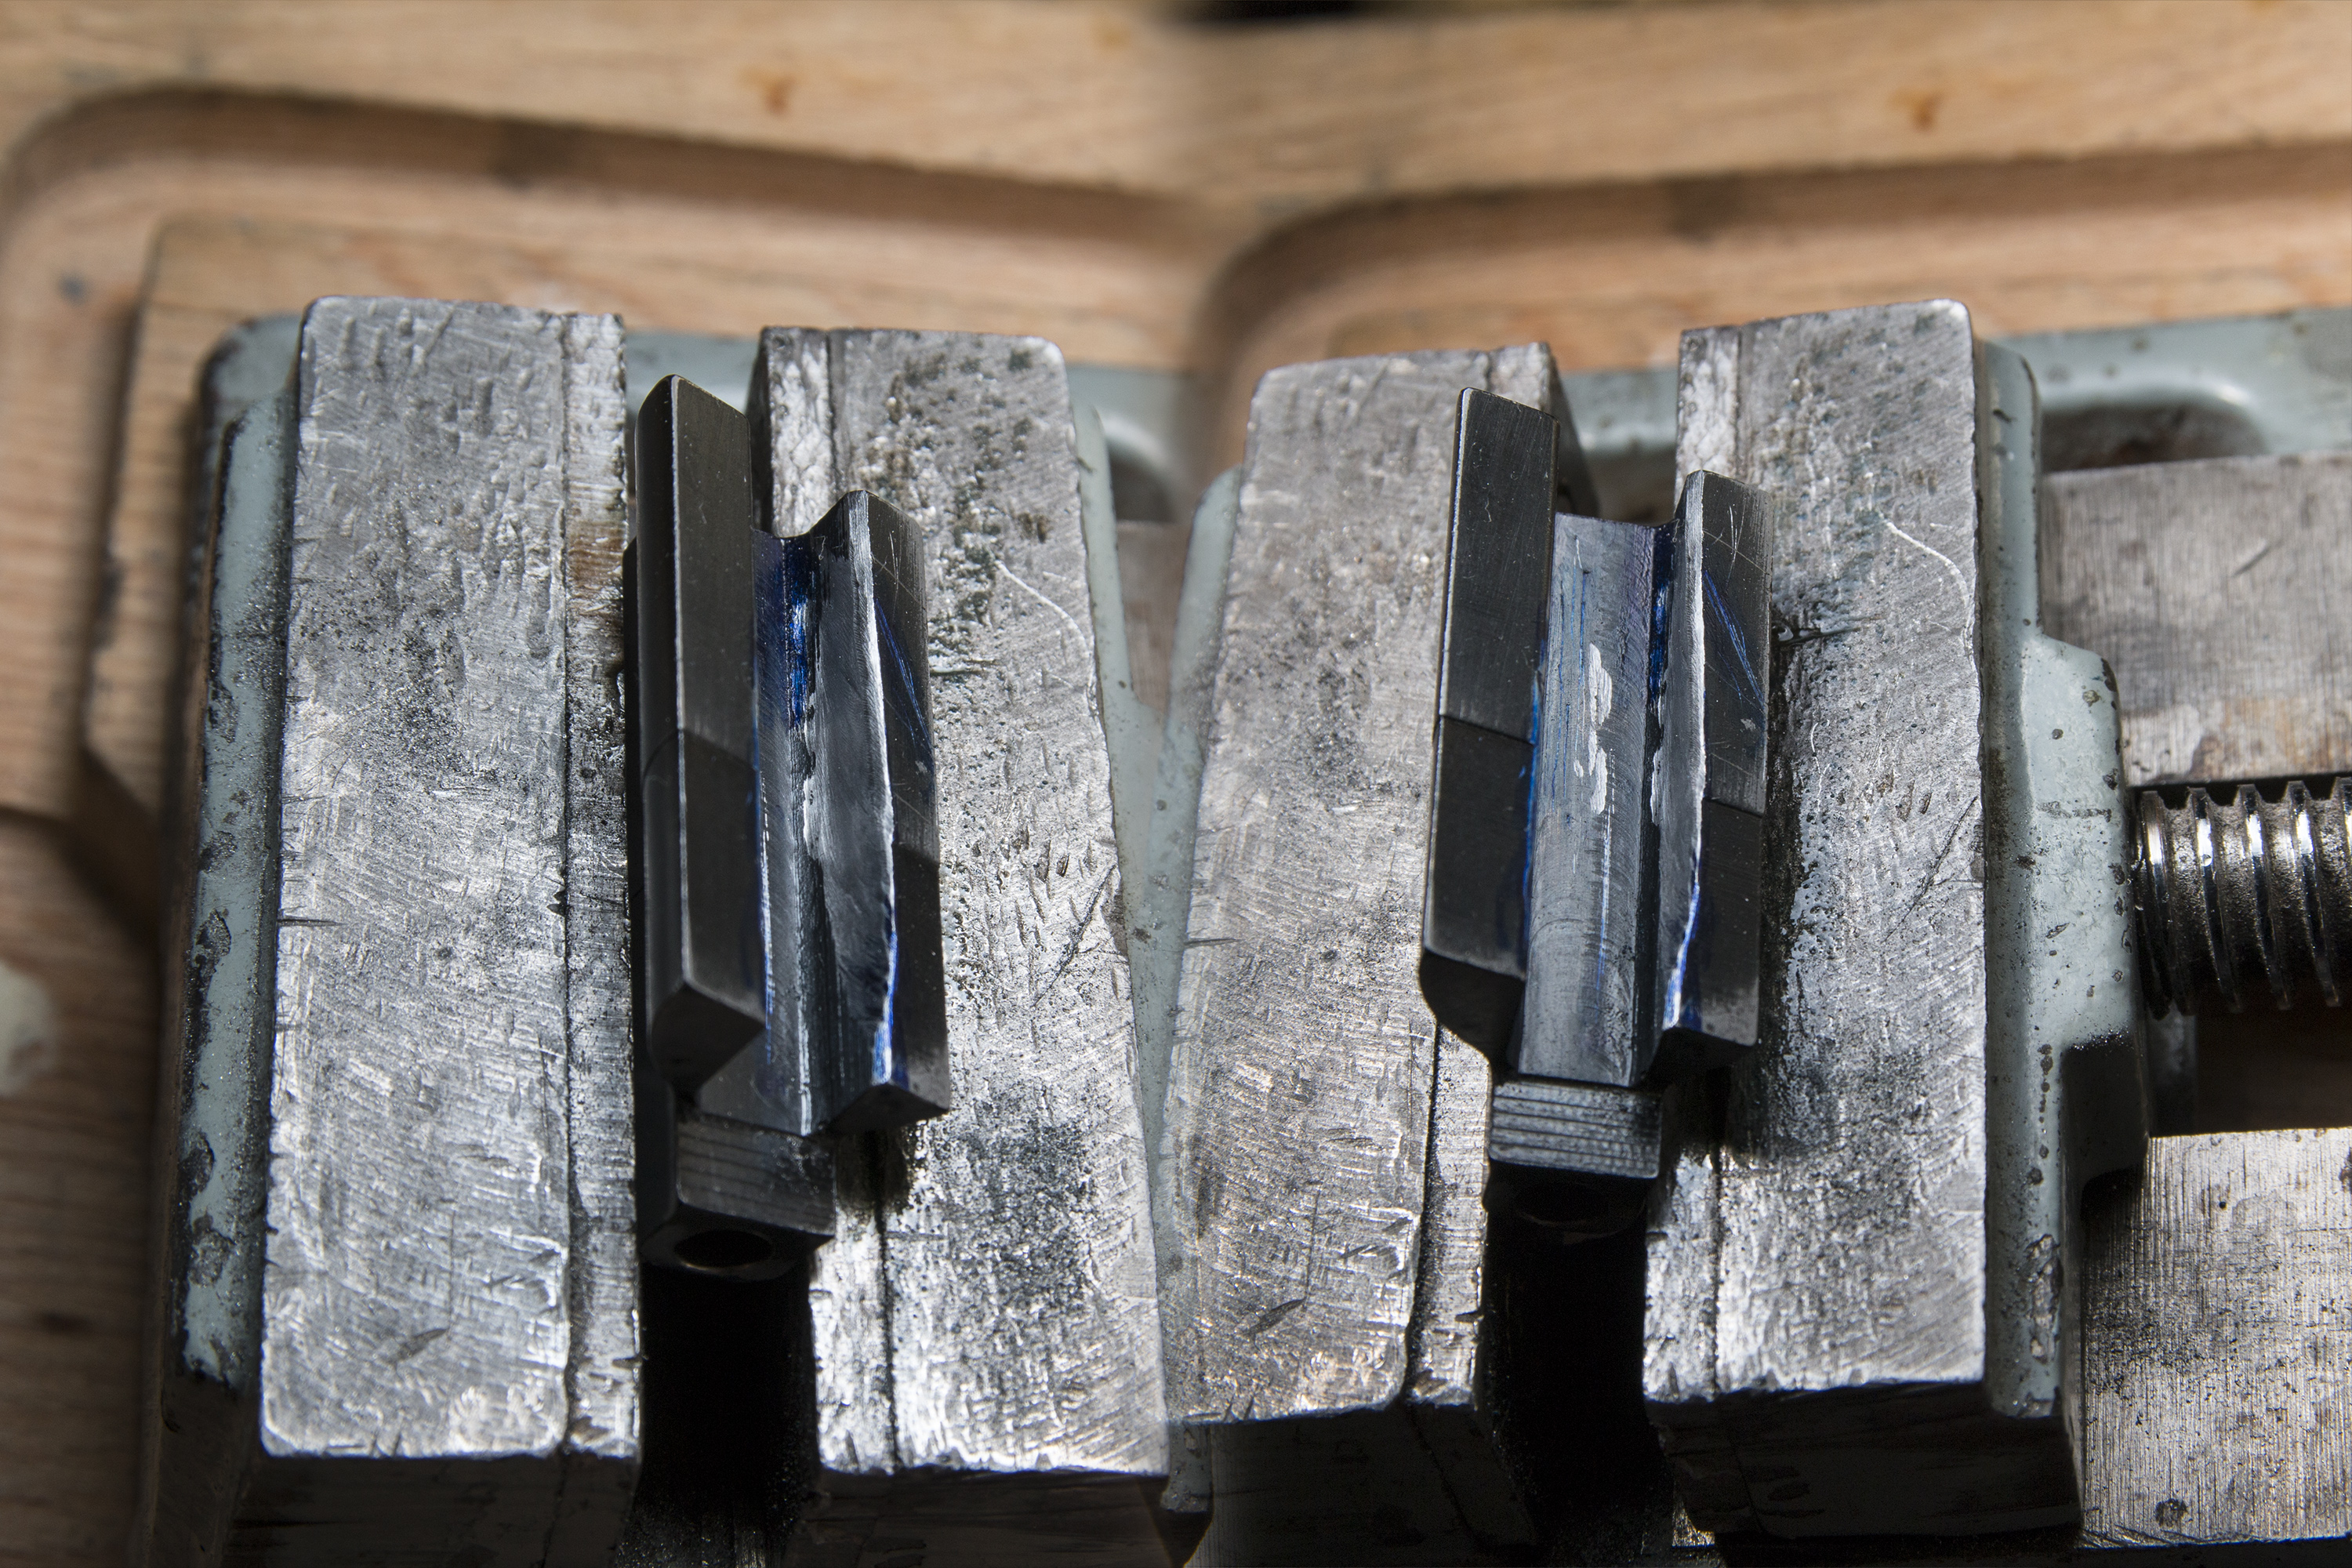
I previously noticed some wear on the recoil spring guide / bolt weight, but didn’t find what would have caused it or if it was there to start with, so I took a magic marker and painted it blue. Now it had new markings and some of them even pretty deep.

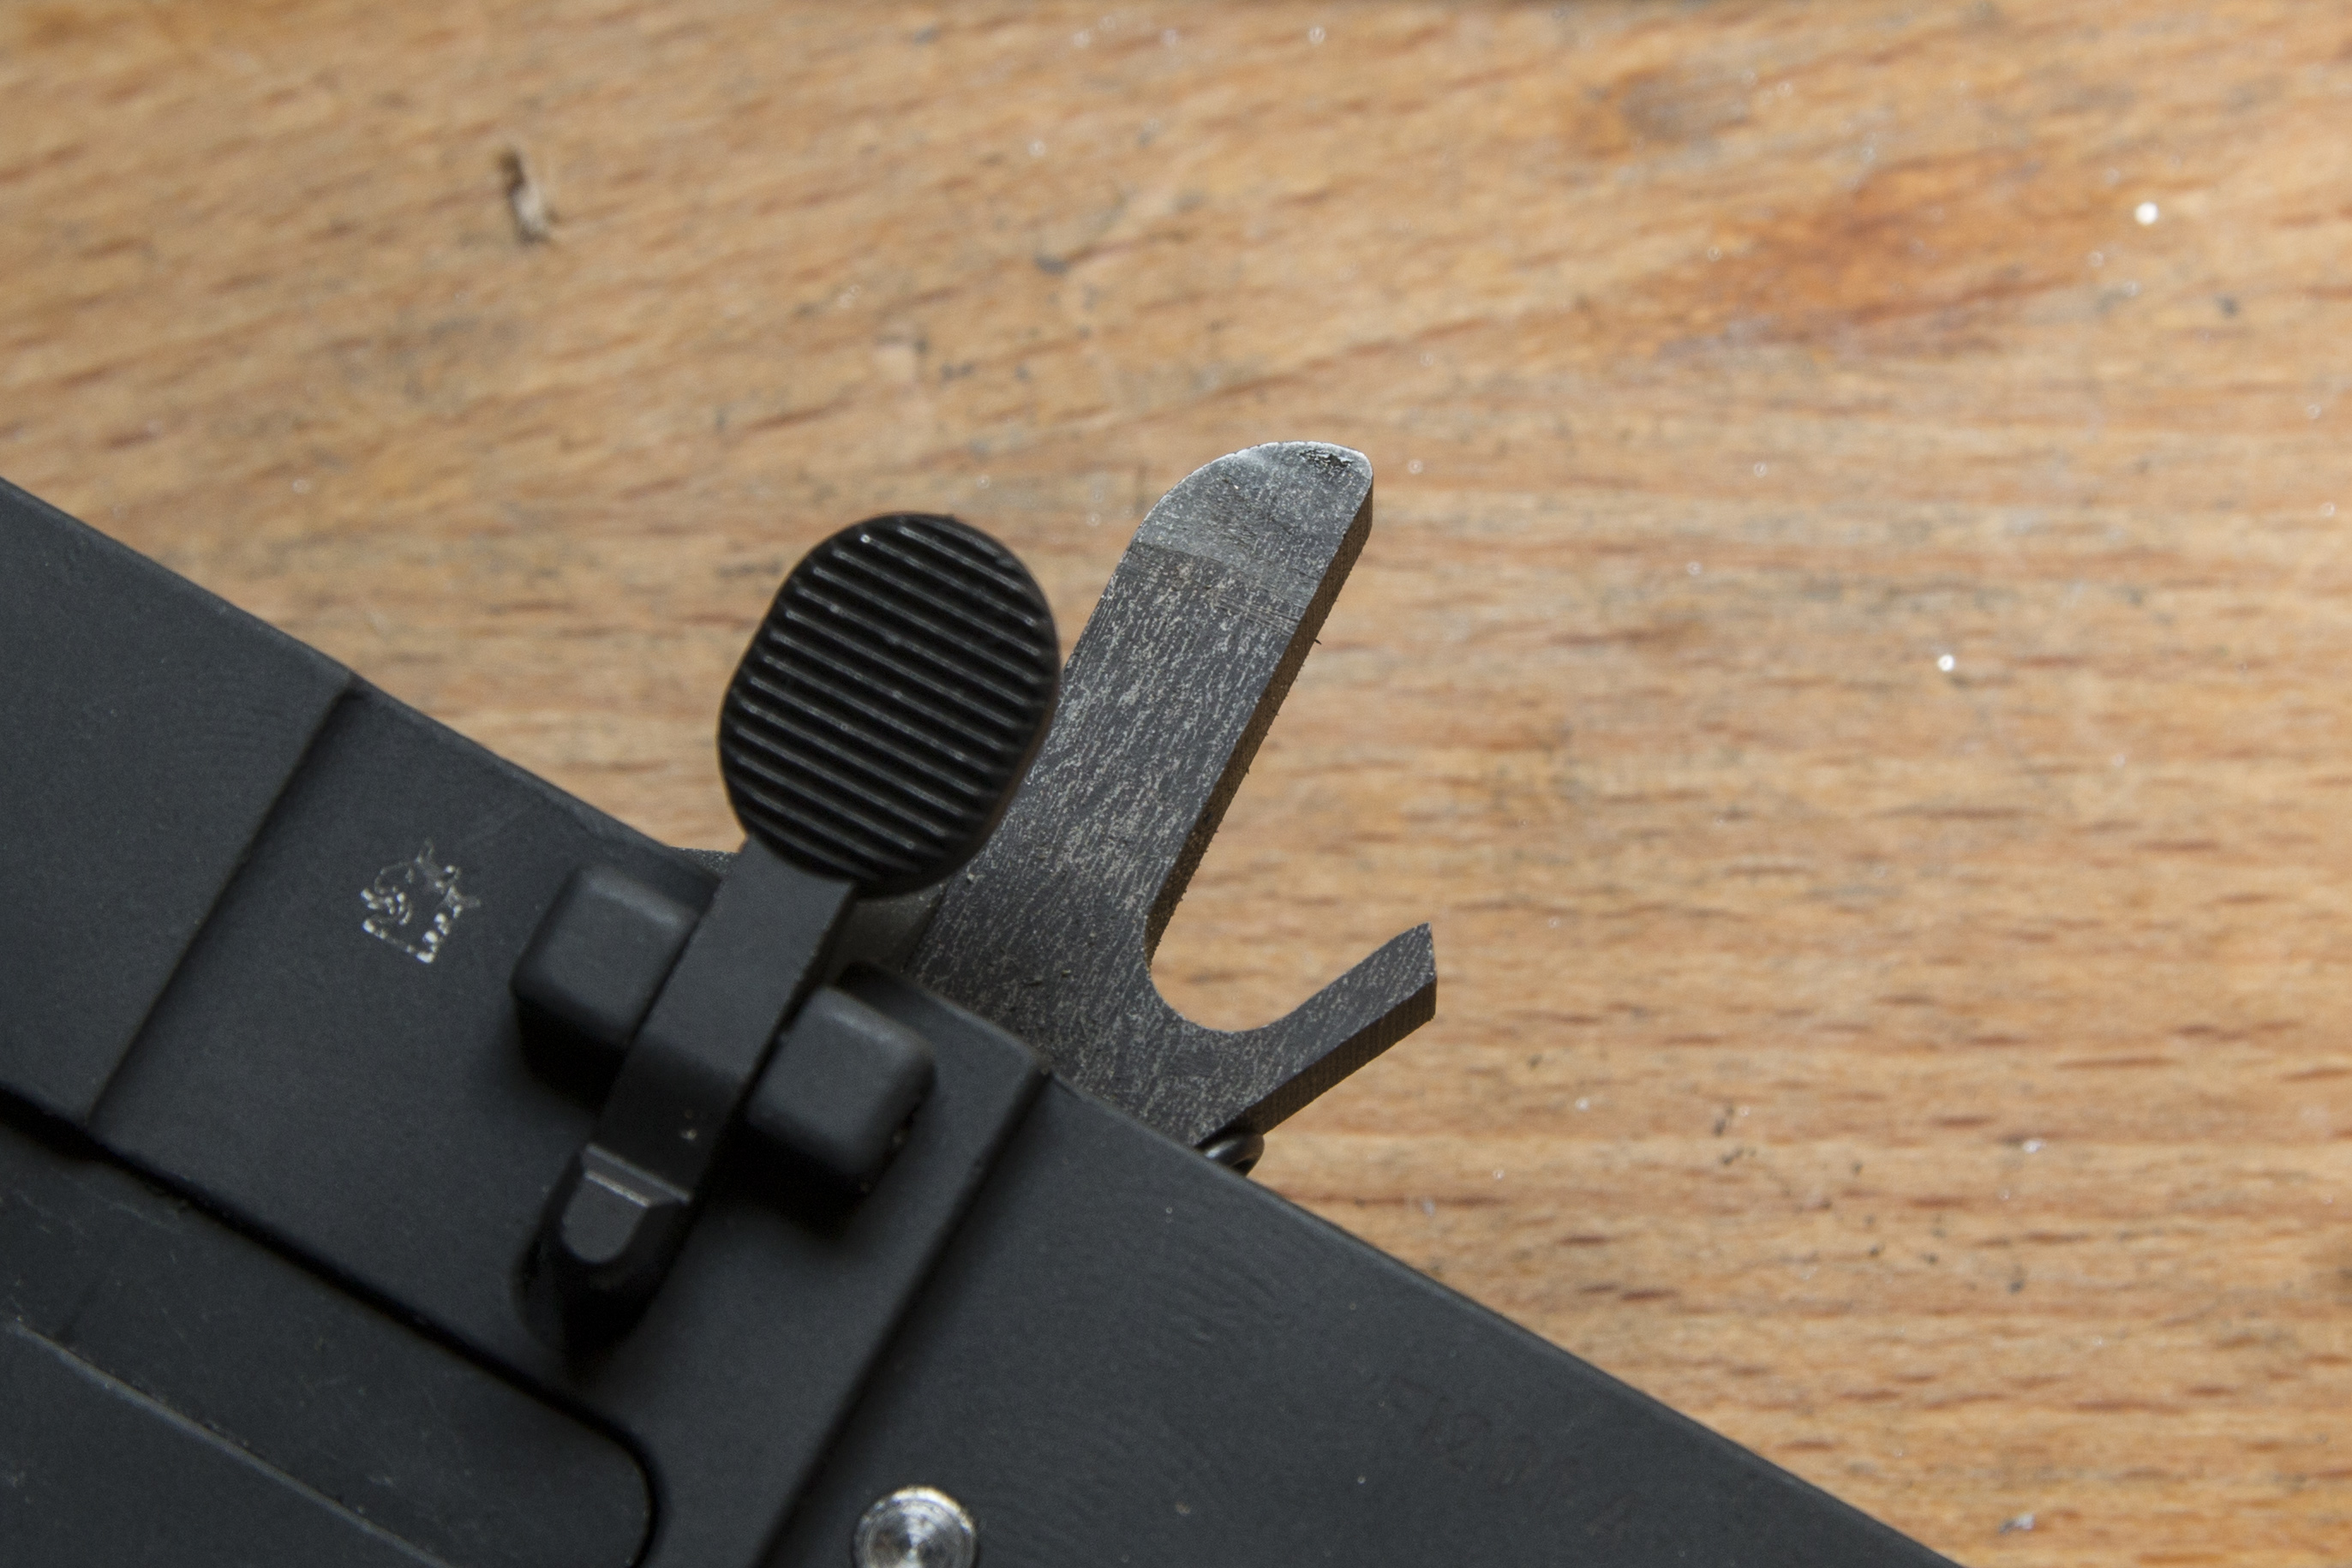
Apparently the hammer had been chipping some metal away from the recoil spring guide as some more investigating revealed that also the side of the top of the hammer had some faint markings. (probably faint due to it being much harder than the recoil spring guide).
To test the theory, I filed down all the markings in the the guide / weight and then re-painted it blue with the marker. I also painted the side of the hammer.
Test firing seems to support the theory as I first shot two mags filled with 20 rounds each, in fast pace and got only one failure to ignite. I then shot 4 actual stages in the training and got one failure to ignite on three of them, although my friend shot one stage and got 3 failures to ignite.
After this it was time to check for possible new markings on the recoil spring guide and there clearly was some new markings to match the few failures to ignite.
http://youtu.be/JHnrE2k9D0w
These seem to suggest that the theory might be right and the recoil spring guide should either be supported so that it cannot wobble in the way of the hammer or to dremel some more out of it, that it can not touch the hammer even when wobbling. (as I don’t have efficient means to add material, I chose the latter)
To make the hammer not able to contact the guide/weight, I removed the firing pin and started the following procedure:
- remove and disassemble the action
- check the guide for hammer strikes
- dremel
- paint blue
- assemble and insert the action back into gun
- open lower receiver
- cock the hammer by hand
- push the guide to the worst possible position
- close the receiver
- dry-fire
- repeat steps 6-10
- goto step 1
I ran multiple iterations and finally the procedure did not appear to produce any more strikes to the recoil spring guide/weight. At this point, the part had also lost so much material that I was glad that I resorted to dremel instead of hand files.
I went testing on the range and there still were failures to fire. It could be noticed that the hammer was still hitting the recoil spring guide. After some hand filing and re-testing, the failures started to be limited to around 1 failure to fire per 2 mags (BDM 25rnd X Form) and sometimes two mags could be emptied on rapid succession without a single failure.
Next task will be to further analyze the possible contact between the recoil spring guide and the hammer. I must also compare the factory supported mil-spec trigger to the one currently in use.
Previous parts: NEA15-22 part I, part II, part III, part IV
next: part VI