Category Archives: IPSC

.22LR AR magazines – Part 2: CMMG

CMMG is a gun manufacturer making AR-15’s in many different calibers: one of them being 22LR. They also have their own 22LR AR compatible magazines. There used to be different models of CMMG 22LR magazines but nowadays only one model is available.

Information regarding the discontinued CMMG magazine models is sparsely available and this article would not be without RifleMags.co.uk. Kudos to them for having this information posted online.

Continue reading .22LR AR magazines – Part 2: CMMG

.22LR AR magazines – Part 1: Black Dog Machine

The .22LR as a caliber needs no introduction. Probably the most important caliber for training (and many other purposes).

.22LR caliber AR’s on the other hand come in many different variety, brand and technology. And almost as a topping on a already sick joke – information about different magazines, their compatibility and differences between generations are nowhere to be found.

The .22LR AR type magazines are in my oppinion the biggest mess in the whole “22AR but what brand and where” -question. I’ve seen people having discussions about same and/or different 22AR magazines without any common knowledge about the confusion.

I’m starting a series of posts covering .22LR AR-type magazines – one manufacturer at a time. Starting from Black Dog Machine.

Note that some magazines have no distinct naming convention so as a clarity to the important issue I’ve come up with GenX -type of naming (the naming started from BlackDogMachine’s Gen2 and Gen3 magazines and I just expanded it around those two)

Enough with the prologue, continue to the article below:

Continue reading .22LR AR magazines – Part 1: Black Dog Machine

Holosun model comparison update

Holosun have been busy updating their micro red dot lineup. It’s about time to have an updated model/feature chart.

There are few discontinued models listed in Holosun’s pages: 403GL, 503C, 515C and 515CU. This does not quarantee that all of the models in the chart below are still available or manufactured. For up to date status of current models please visit https://holosun.com

Holosun divides their red dots into two categories: Classic and Elite series. In my oppinion it would serve no purpose to have two charts so I’ve added the new models to the previous chart and updated the columns to reflect new features introduced with new models.

  Aimpoint compatible base Green reticle Gold reticle Solar power Side battery housing Rotary brightness dial Circle and 2MOA dot Integrated lens covers Ruggerized frame around turrets Titanium Frame Up to 100000 hours battery life Fully submersible 30 mm lens Discontinued
HS403A                            
HS403B x                          
HE403B-GR x x                        
HS403C x     x                    
HE403C-GR x x   x                    
HS403GL x       x                 x
HE403GL-GR x x     x                  
HS403R x       x x         x      
HE403R-GD x   x   x x                
HS503BU x           x   x          
HS503C x     x     x             x
HS503CU x     x     x   x          
HE503CU-GR x x   x     x   x          
HS503GU x       x   x   x          
HE503GU-GR x x     x   x   x          
HS503R x       x x x   x   x      
HE503R-GD x   x   x x x   x          
HS515BU x           x x x         x
HS515C x     x     x x x          
HS515CM x     x     x x x     x    
HE515CM-GR x x   x     x x x     x    
HS515CU x     x     x x x         x
HS515GM x       x   x x x     x    
HE515GM-GR x x     x   x x x     x    
HE515GT x       x   x x x x   x    
HE515GT-GR x x     x   x x x x   x    
HE515CT x     x     x x x x   x    
HE515CT-GR x x   x     x x x x   x    
HE530C x     x     x x    x   x x  
HE530C-GR x x   x     x x    x   x x  
HE530G-GR x x     x   x x     x x  
  • A base model without Aimpoint compatible mount
  • B base model with Aimpoint compatible mount
  • C Solar powered model
  • G External battery housing
  • R Rotary Brightness Dial around battery housing
  • U Ruggerized frame around turrets
  • M Extra ruggerized frame + better waterproofing (IPX8 instead of IP67)
  • T Titanium frame and IPX8 rating
  • HS Classic series
  • HE Elite series
  • 403 2MOA dot
  • 503 65MOA ring + 2MOA dot
  • 515 Ring + dot + integrated flip-up lens covers
  • 530 30 mm lens (compared to 20 mm in rest of the lineup) Also titanium frame (and IPX8 rating) without M or T in model name.

Holosun micro red dot feature comparison chart

ABCGLUM and all combinations of them. Confusing isn’t it?

What are the differences between Holosun micro red dot models?

Aimpoint compatible base Solar power Side battery housing (Aimpoint micro style) Circle and 2MOA dot Integrated lens covers Ruggerized frame around turrets 30 m and 30 min waterproof
HS403A
HS403B x
HS403C x x
HS403GL x x
HS503BU x x x
HS503CU x x x x
HS503GU x x x x
HS515BU x x x x
HS515C x x x x
HS515CM x x x x x x
HS515CU x x x x x
HS515GM x x x x x x


  • A base model without Aimpoint compatible mount
  • B base model with Aimpoint compatible mount
  • C Solar powered model
  • G External battery housing
  • U Ruggerized frame around turrets
  • M Extra ruggerized frame + better waterproofing
  • 403 2MOA dot
  • 503 65MOA ring + 2MOA dot
  • 515 Ring + dot + integrated flip-up lens covers

Cleaning brass with ultrasonic cleaner

Brass cleaning science! We’ve tested three different solutions for cleaning fired brass with ultrasonic cleaner.

The  temperature was set to 50 degrees (Celsius of course, that’s probably roughly 56 to 125 inches in US temperature units, stones or is it nails?) Cleaning time was 15 minutes.

Below in the table you can see the different concentrations used. Every solution was mixed to cost 0.10€. I thought that to be the only viable way to measure different solutions. It would not have been fair to just measure the amount of solution if it’s not feasible to use the most expensive solution in long term use. All mixtures were made to a 125 grams of  35 C° water. This naturally threw difference of the total  amount of cleaning solutions by ~10% as C4+water sums only 127 g and soap+acid+water 150 g. But for the nature of cleaning brass outside of synthetic tests I believe this type of difference is acceptable.

Washing solution Price ( €) Package size (grams) Price per gram Amount in solution (grams) Price of solution
Oregon Ultrasonic 15.9 1000 0.0159 6.98 0.110982
Bore Tech C4 29 473.176473 0.06128791615 2 0.1225758323
W5 dishwasher 1.19 500 0.00238 11 0.02618
Citric acid 0.78 40 0.0195 4 0.078
Mix of acid+soap 1.97 in total 15 in total 0.10418

As you can see the Bore Tech C4 Carbon Remover was used only with ~1.6% concentration. W5 dishwasher soap had to be added relatively huge amount in order to reach even close to what Carbon Remover and Ultrasonic cleaning solvent costs. Most likely lower amount of W5 dishwasher soap would have been sufficient. You can purchase citric acid way cheaper in larger containers.

All brass looked pretty much the same before going into the bath.

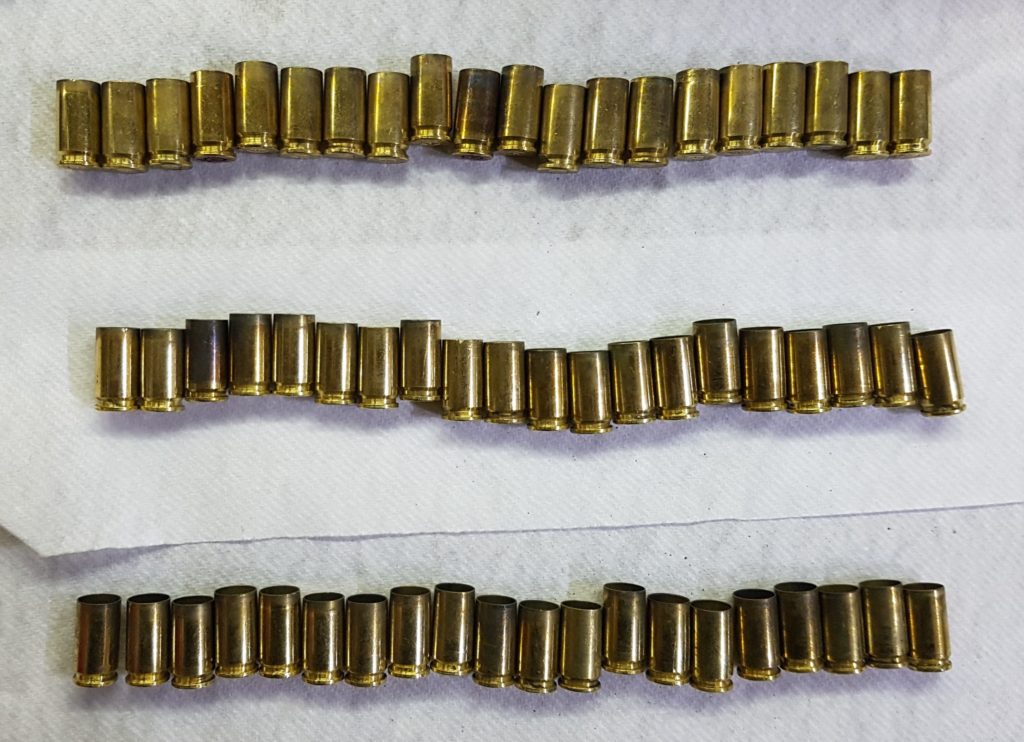
Brass were sorted from these three rows to three cleaning containers randomly.

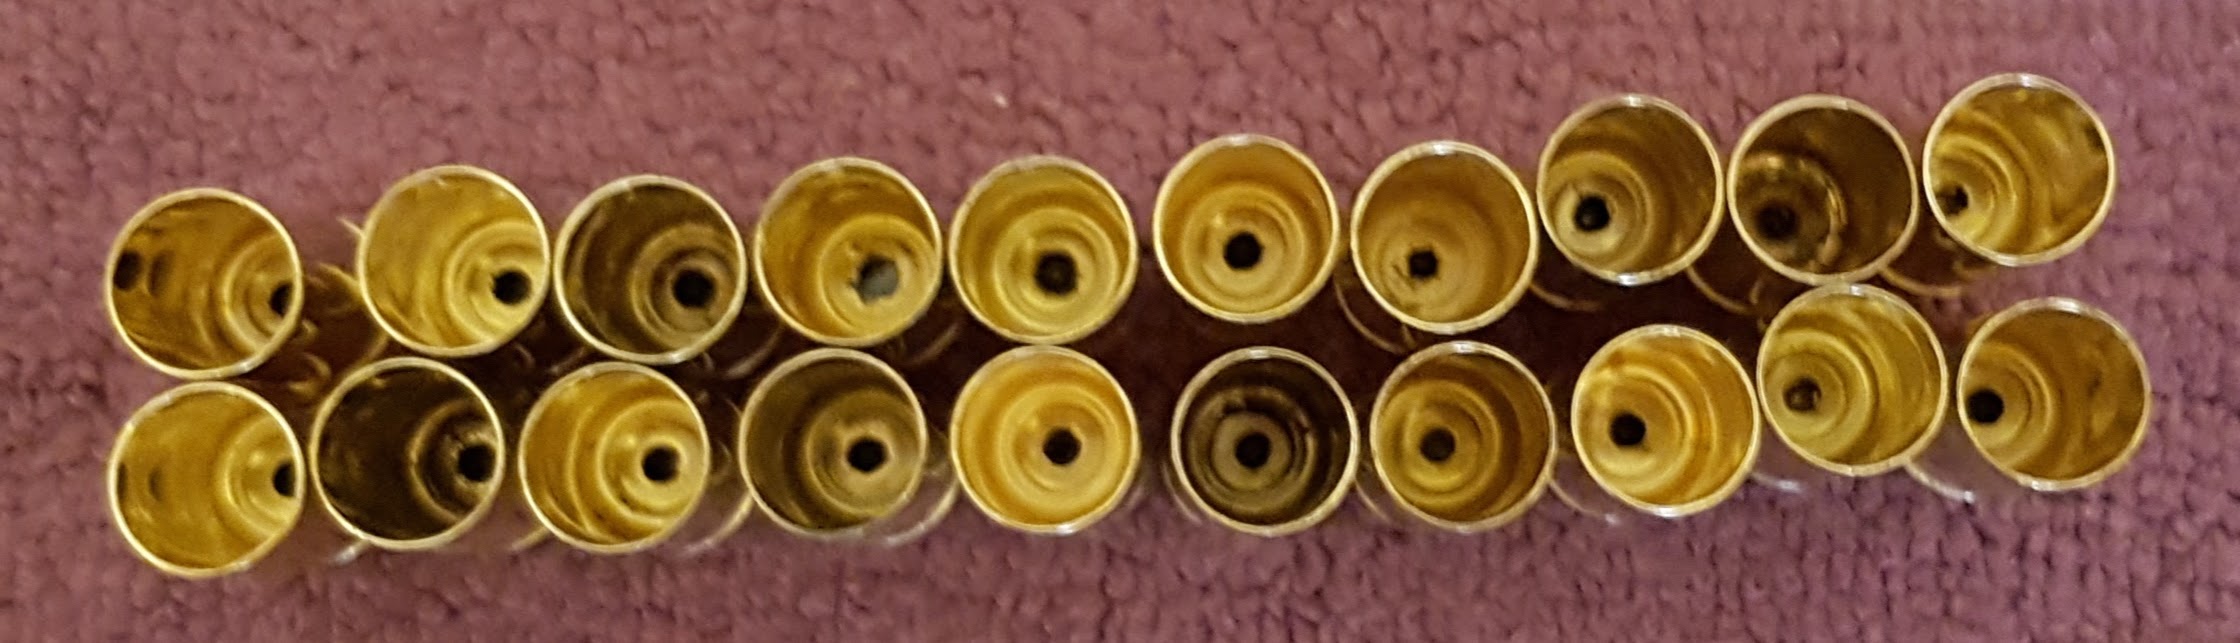
Inside the brass looks pretty bad.

Headstamps were mostly S&B but other brass were also in the mix.

After 15 minutes of cleaning the water had turned to a black musk in every cleaning container.

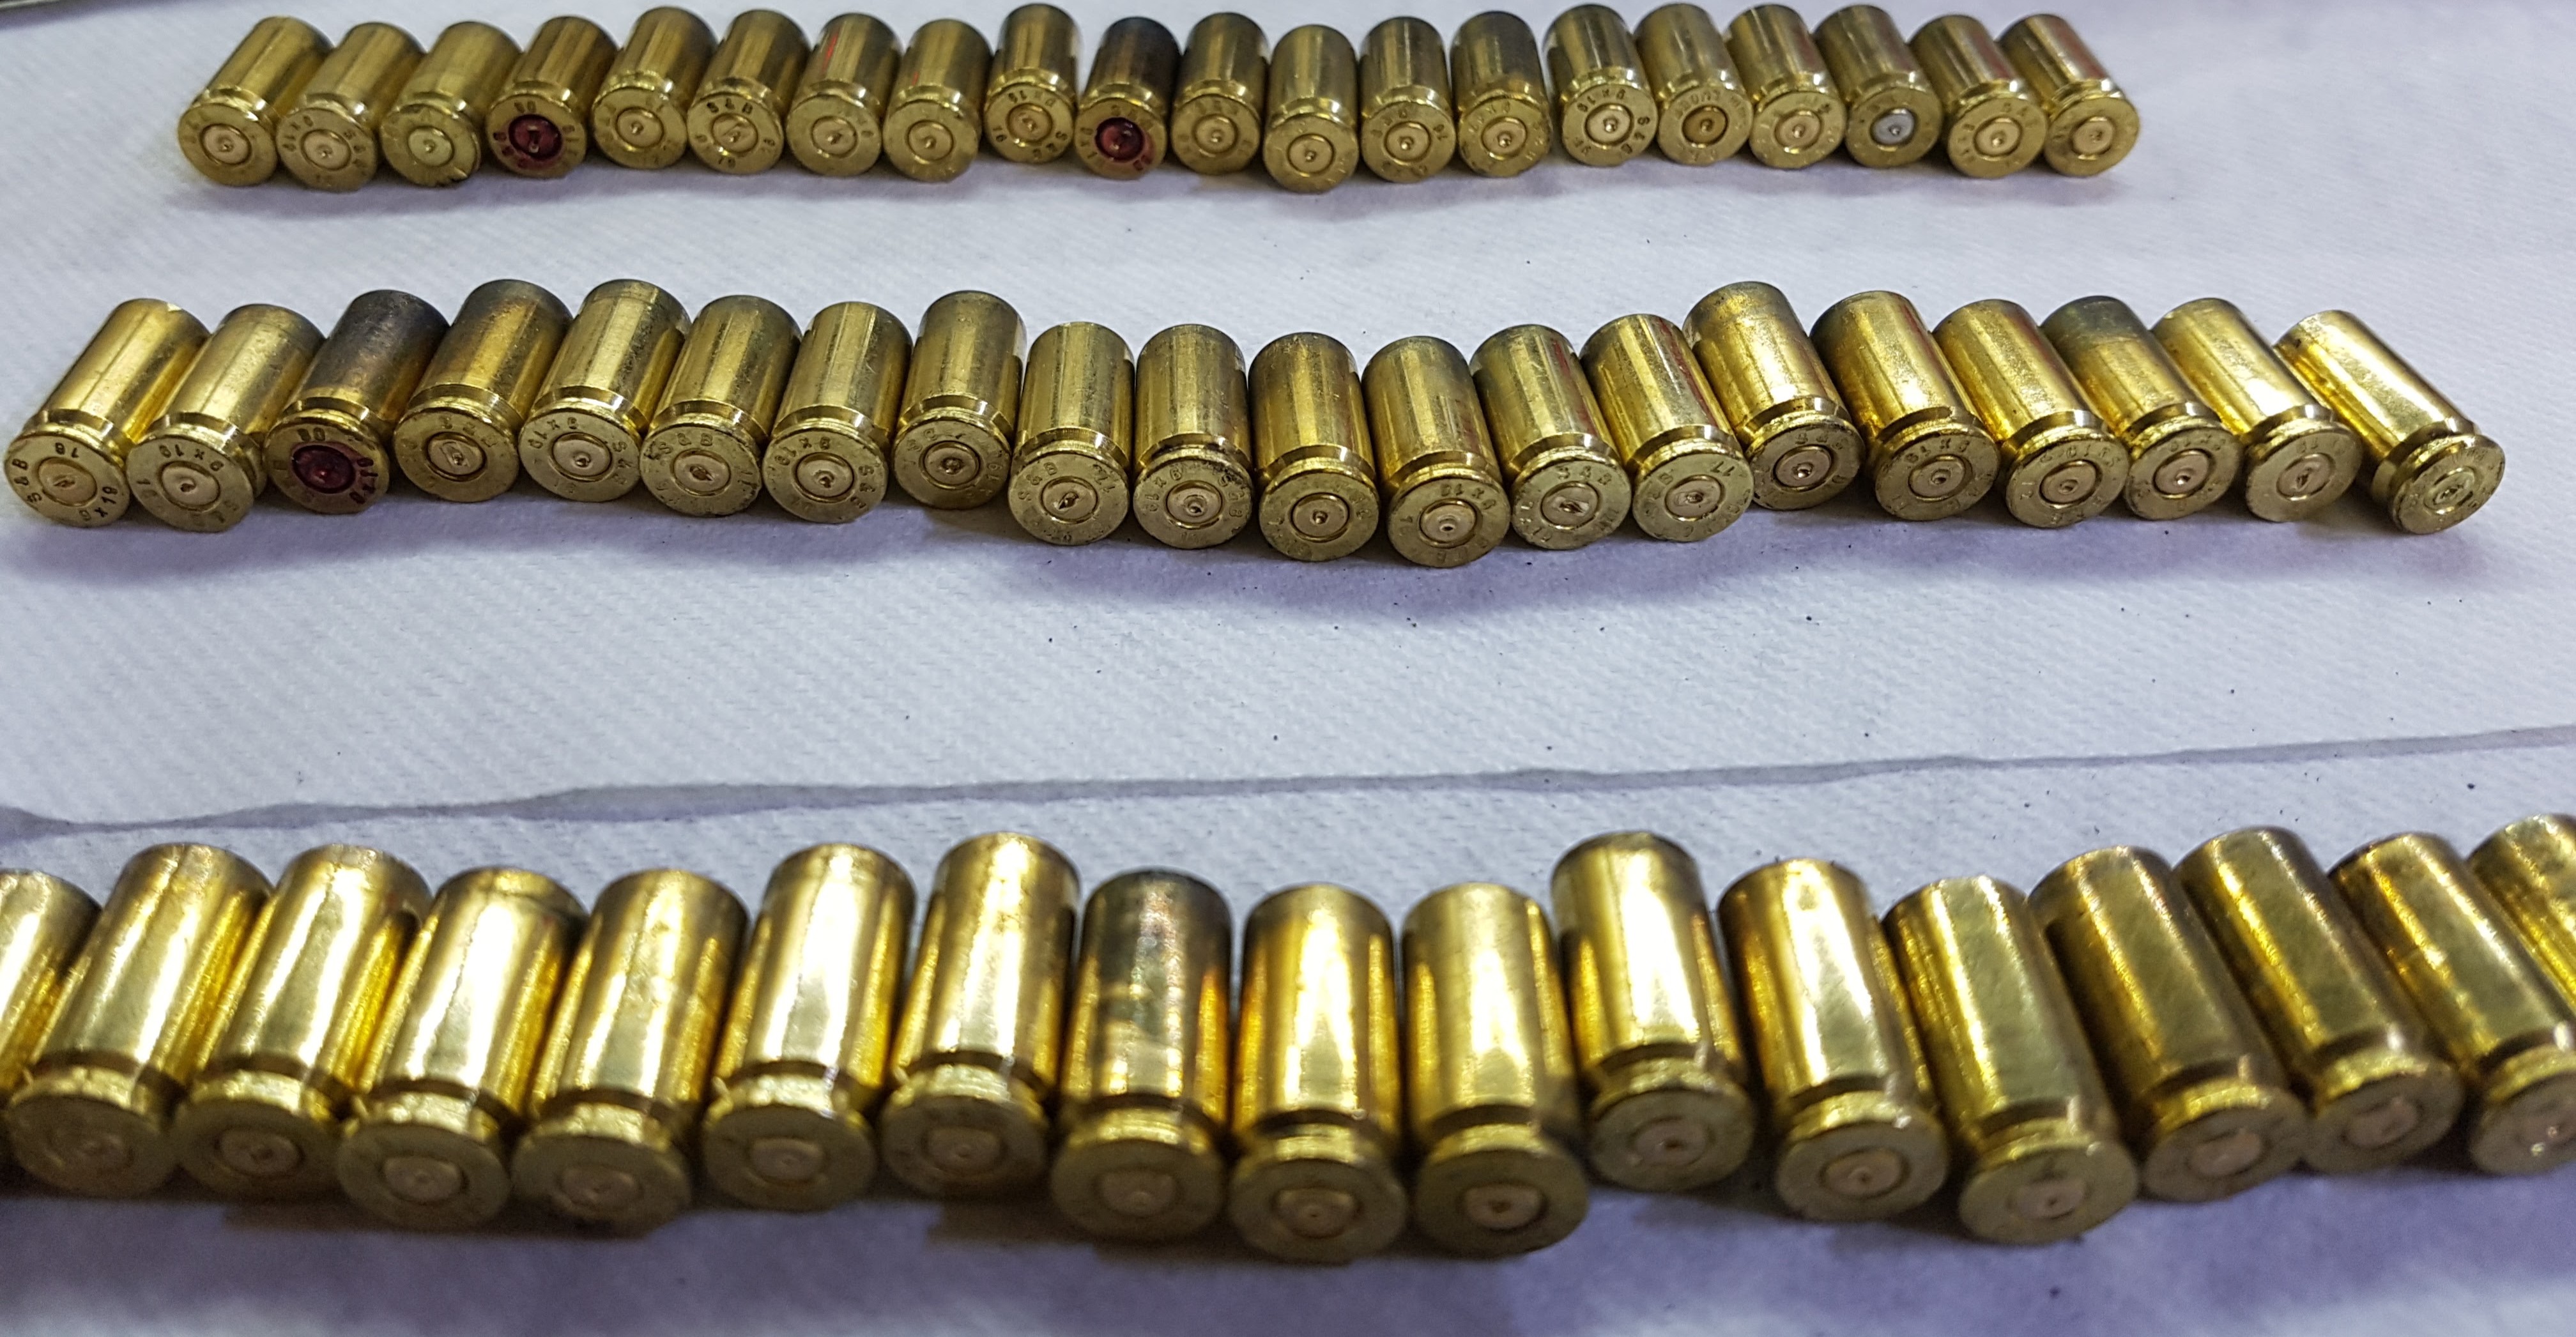
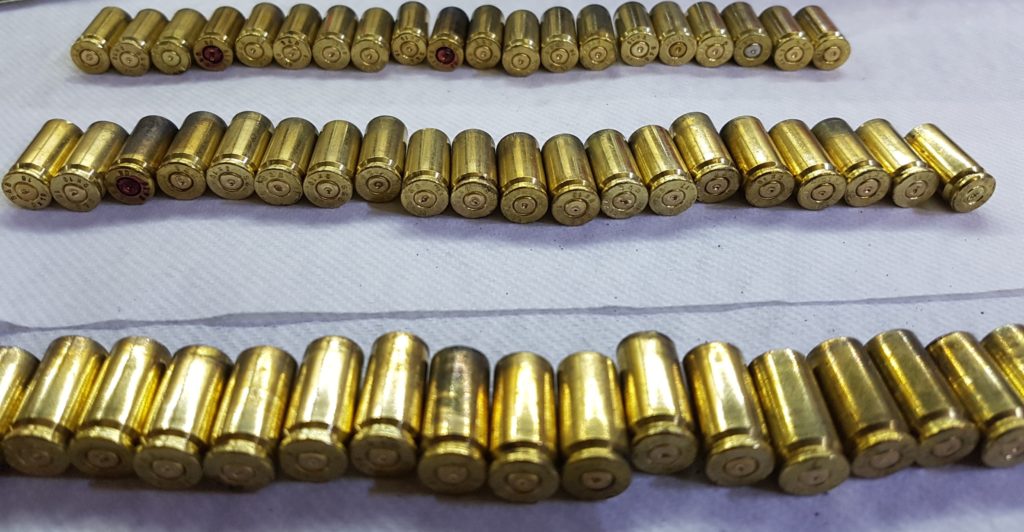
Let the photos be the judge which solvent won:

From top to bottom: W5+citric acid, Oregon, Bore Tech

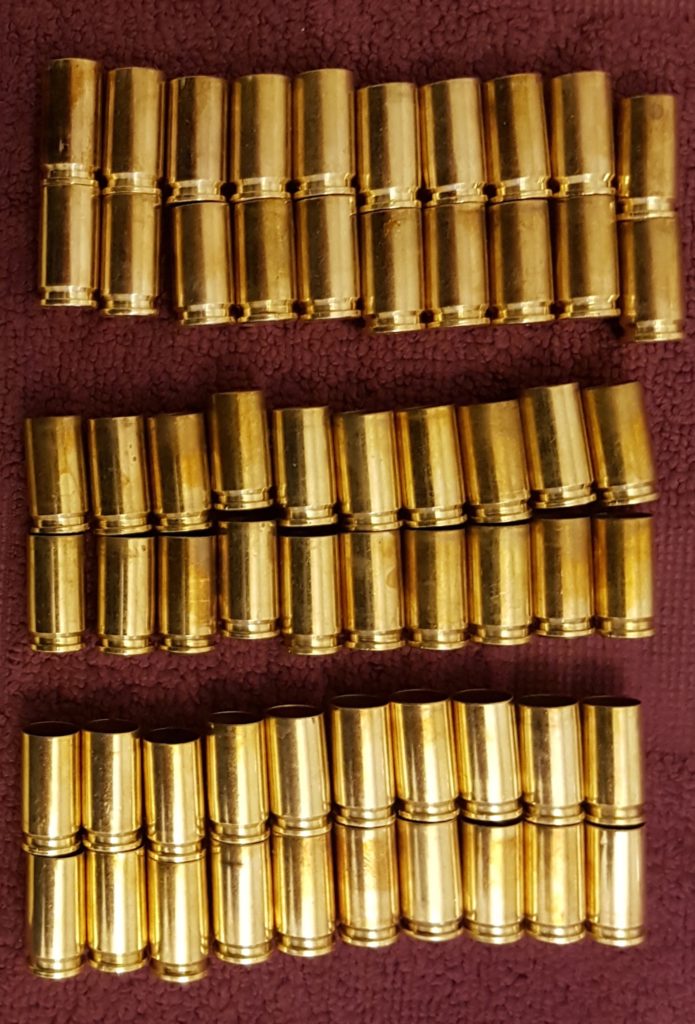
It’s clear that Bore Tech C4 Carbon Remover was the most effective on cleaning the outside of the brass. Picture may not show the difference as clearly but nearly all dark spots were gone on brass that was bathed in C4 Carbon Remover, all brass were shiny and uniform color.

Next came the mix of dishwasher and citric-acid. Brass is shiny but slightly tinted toward brown compared to Carbon Remover.

Last place in cleaning the outside came Oregon’s Ultrasonic Cleaning Solution. It left dark spots in most of the brass and it’s even visible in the picture how the brass is darker that with other two contenders.

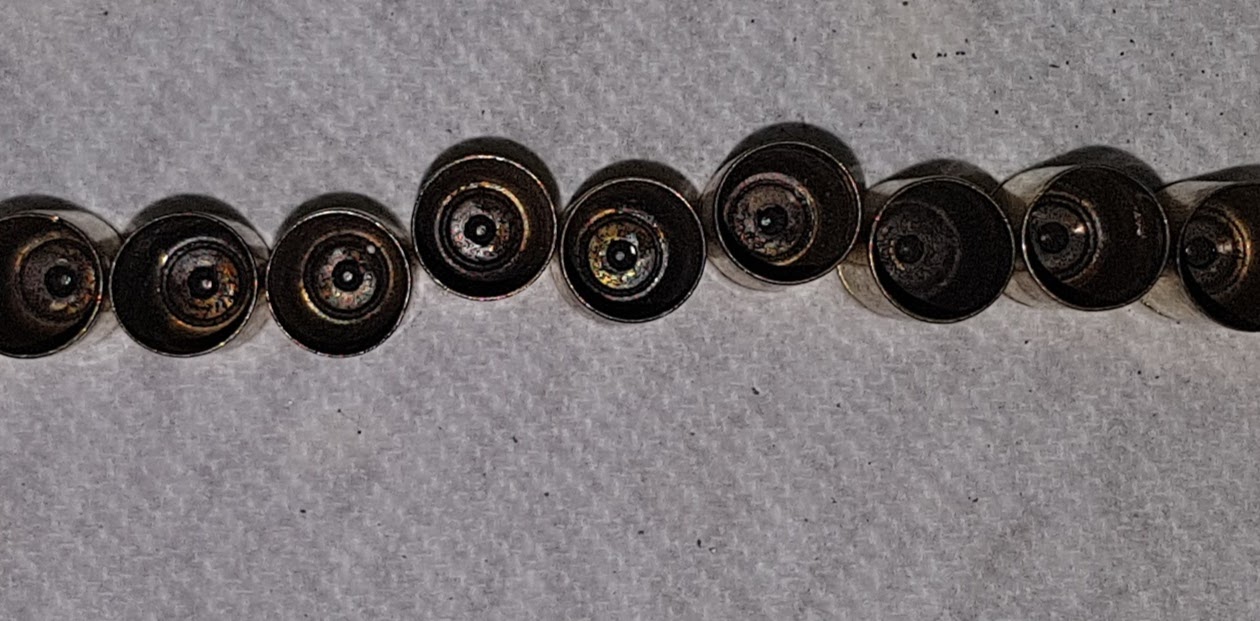
When comparing inside of the brass there was clear difference between all three cleaning solutions.

Dishwasher soap + citric-acid

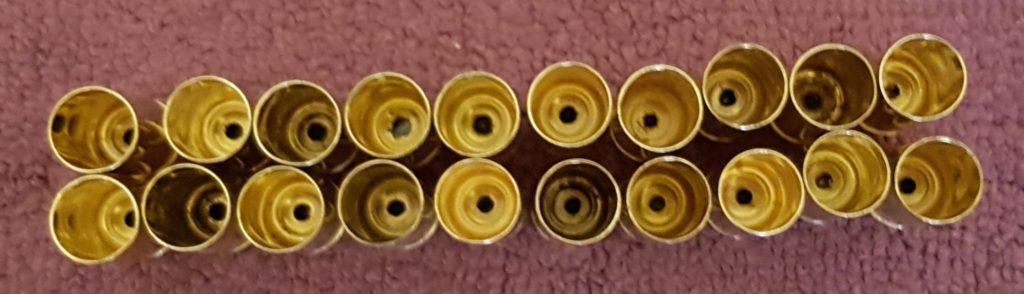
16 brass out of 20 were cleaned extremely well with W5+citric-acid. Some were left with dark spots, it’s unclear for me why as when comparing the darker brass with super-shiny all were most likely once fired S&B brass and collected from indoor range. So no moisture contamination should have taken in place.

Oregon Ultrasonic Cleaning Solution

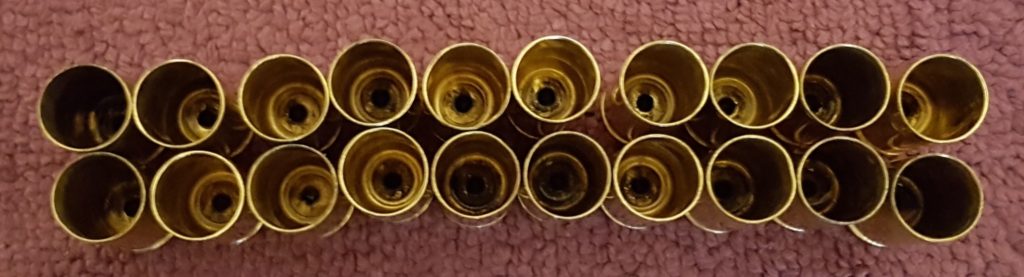
11 brass out of 20 were somewhat cleaned, but none of them came even close compared to W5+acid mix. Some of the “clean” brass in this group might be dirtier than the “dirty” in other groups.

Bore Tech C4 Carbon Remover

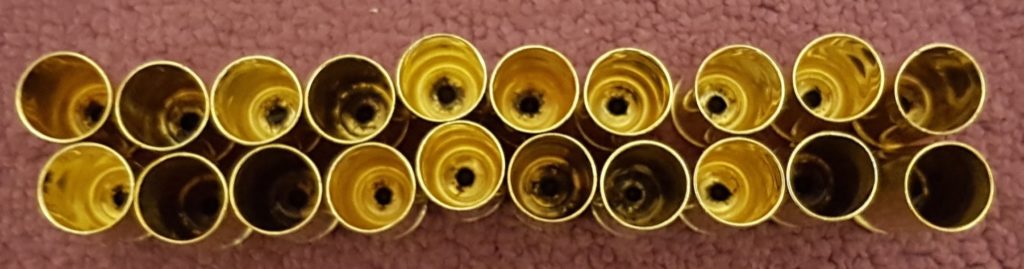
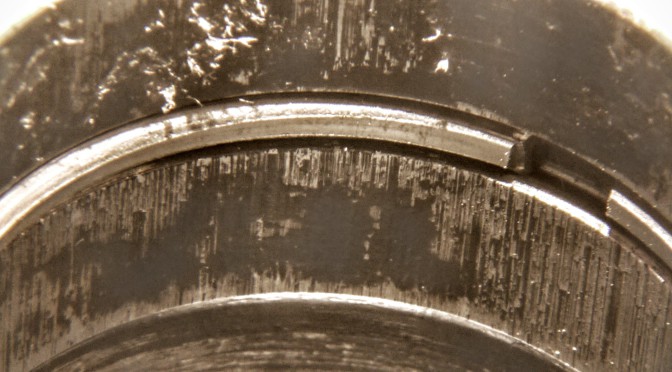
Even though Carbon Remover won when comparing cleaning results at outside of the brass it’s not as effective cleaning the inside of the brass than home-made mix of W5 dishwasher soap and citric-acid. 12 out of 20 brass was super-shiny but the rest was left unsatisfying dirty. Notice how there is some black residue around the primer hole where dishwasher+acid left that area cleaner on most brass. Again when checking the headstamps there were no clear correlation between clean and dirty brass. 7 out of 8 dirty brass was S&B and most likely only once fired e.g. factory loads.

All brass in the test were handled with nitrile gloves in order to prevent grease-marks from fingers. Brass was not sorted or selected anyway. Most of the headstamps were S&B. Others were TCS (4pc), G.F.L (1pcs), STV (1pcs) and Geco (1pc). Some brass might have been reloaded (at-least two S&B had different primer than others), but majority of the brass was once fired factory loads. All brass was collected from indoor range so no water or moisture contamination could have taken place which could have baked some of the powder residue to the brass. There were no correlation of cleaning results between different brass whether they were reloads,  or factory ammunition between different companies.

The Ultrasonic Cleaner used in the test was cheap Chinese made 9l Stainless steel made tabletop cleaner. Advertised Ultrasonic cleaning power is 200W but no more than 150W is used from the outlet during cleaning cycle with heating turned off. Brass was placed in three identical thin wall plastic containers and adequate amount of water was added to the stainless steel tank so all three plastic containers holding the 125g water, cleaning solution and brass, started floating. Plastic is not optimal container as it has tendency to absorb ultrasonic waves, but in this test the purpose was not to clean brass as effectively as possible, only to compare different cleaning solution consecrations when their calculated cost was identical.

End result of this test was to continue tests with dishwasher soap and citric-acid. Maybe changing the concentration or adding salt and/or dishwasher detergent to the mix might help cleaning even the most stubborn dirty brass. Naturally cleaning 20 empty shells at a time is not the goal. When cleaning solution mixture is complete the purpose is to clean as much brass as it’s possible to load to the 9 liter (5 yards for you imperial folks) cleaner.

Speed Cycling and reliability mod for Baikal MP-153

There is always that one particular brand, type or batch of shotgun ammunition that does not work with semiauto shotguns. Some shotguns are more picky than others and even same shotgun models some individual guns cycle same ammunition that other guns struggle with.

For DIY person it’s tempting to fix this uncertainty. Naturally lapping the bolt carrier rails, polishing all metal-to-metal contacts will help the gun to cycle. With gas operated shotguns drilling gas ports slightly larger might also help.

After doing all above I still found that there exists ammunition that does not cycle reliably with my Baikal MP-153.  Mostly really old 24g skeet and trap ammunition. Some may ask that why bother? Those asking that question don’t get the tickling sensation when fixing something makes things better.

Continue reading Speed Cycling and reliability mod for Baikal MP-153

DIY Shell Prepper

Shotgun Slug and Buckshots have nasty tendency to cost much more than most smaller shotsize ammunition. This has driven many shooters to seek cheaper ways to achieve Slugshots by modifying birdshots or using the birdshot cartridge as a base and just changing the shots to slug.

I came up this brilliant idea of a shotgun shell prepper from Youtube user Mountain Storm . All credits to him for the idea.

Shell Prepper will cut the star crimp away leaving a small rim which will act as the crimp to hold the wad and slugshot in place.

Without further ado – DIY Shell Prepper v.1.0

DIY Shell Prepper

Continue reading DIY Shell Prepper

Light Mount to Special EDCE

The year turns to time with less light which means some SRA competitions in the dark w/ weapon lights.

I have currently shot mostly with my custom 2011, Special EDCE, but my only pistol with a light mount is CZ Shadow.

As we all know, xx11 pistols have different grip angle than CZ, which is a problem as currently my wrists tend to turn to xx11 angle, so in the dark when you can’t properly see, the CZ points upwards if the wrists are not adjusted.

So set to enable mounting my pistol light (Nextorch WL10) to the Special EDCE. The options were to attach or machine some rail. We went with the latter.

Here are few pictures of the process:

nextorch_light_profile
measuring the mounting profile on Nextorch WL10

Milling the mount to dust cover

Finished mount
Finished mount

End product
End product

Unfortunately the dust cover does not have very much structural strength so we had to make some compromises which makes this a custom fitting between the gun and the lamp in question. So the result is not an actual picatinny/weaver rail, only similar to.

IPSC Semi Auto Open Division Rifle Build

Last season (2014) I decided to try shooting in Open Rifle Division and started more detailed specification (i.e. spreadsheet) on will be in the rifle.

Initial specs were pretty simple with at least 15 inch free float and 1-6x variable scope, but soon came more complicated. First I was thinking about a carbon float but with some insights from an experienced gunsmith and thorough browsing through the web I came to conclusion that a slim keymod float would be the choice:  keymod is mostly holes –> light, but enables accessories and slim profile (1½”) gives better grip and adds to lightness, still being stiff enough. At the moment I couldn’t find many ways to acquire 15+ inch slim keymods to Finland so I went with Leapers UTG in FDE and thus started acquiring also the magpul parts in FDE.

I had grown fond of Magpul MIAD grip (with the largest back piece) in my two other rifles (Standard and Minirifle) so that was the obvious choice for this build too. The A2 stock was also a little clumsy on some specific stages and adjustable stock would have had it’s place. I was wondering between Commercial- or MilSpec, when I found out that Commercial stock can be extended further than the MilSpec enabling a setting for proper eye-relief in both prone and standing positions as head is usually on more forward position on prone and some other specific shooting positions (more about this on a later post). Combined with a proper pull length for my physique/shooting style, the longer setting has its place (at least when shooting with t-shirt instead of plate carrier which would add to the pull length). So the stock was selected to be Magpul CTR Commercial Spec.

Status of the Open Division build with standard division rifle for scale
First parts have arrived! (current standard division rifle for scale)

Continue reading IPSC Semi Auto Open Division Rifle Build